10 Underutilized Free Facebook Features
The importance of paid promotion on Facebook, and other social media channels is often stressed within tourism marketing. However, more often than not, we see Facebook’s many free tools being underutilized by Destination Marketing Organizations (DMOs). Although paid campaigns are highly encouraged to expand your reach, there are plenty of tools to use on the world’s largest social media site without spending a dime. Here are 10 underutilized free Facebook features.
1. Add Partner Events
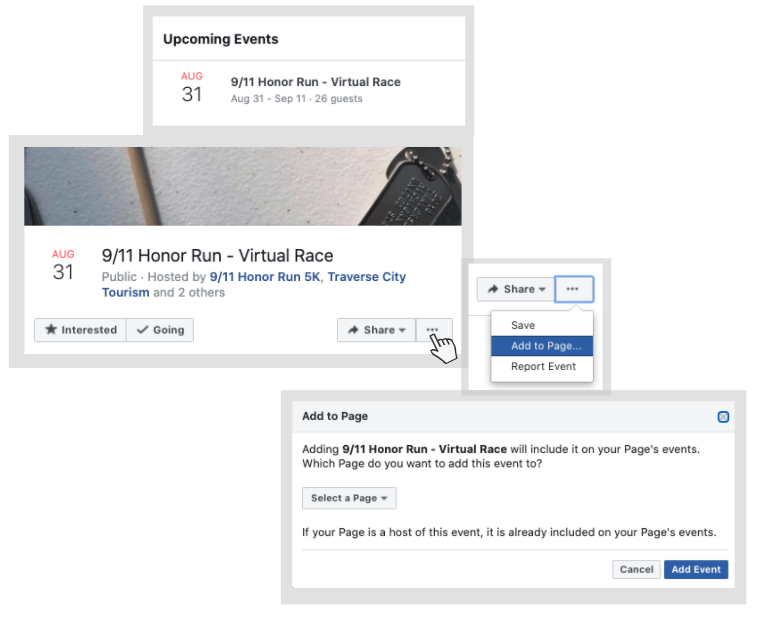
Promoting event calendars can be a struggle for most DMO’s which makes this a must use best-kept-secret by Facebook. You can add events from other Facebook Pages to populate your events tab, without creating new events or sharing them to your timeline.
Following these simple steps to promote your destinations events:
- Find a visitor-friendly Facebook event within your destination that you’d like to highlight.
- Click the three dots next to the ‘”Share” Button.
- Click the “Add to Page…” option.
- A pop-up menu will display and prompt you to select the Facebook Page you wish to share this event.
- This event will now appear in on Page’s events tab, and gain additional exposure!
This is a great tool for destination marketers. It’s easy, beneficial to your Facebook presence, and provides an additional service to your partners. Ask stakeholders to email links to their Facebook events. This will ensure promotion of the event, and save you time!
2. Create Video Playlists
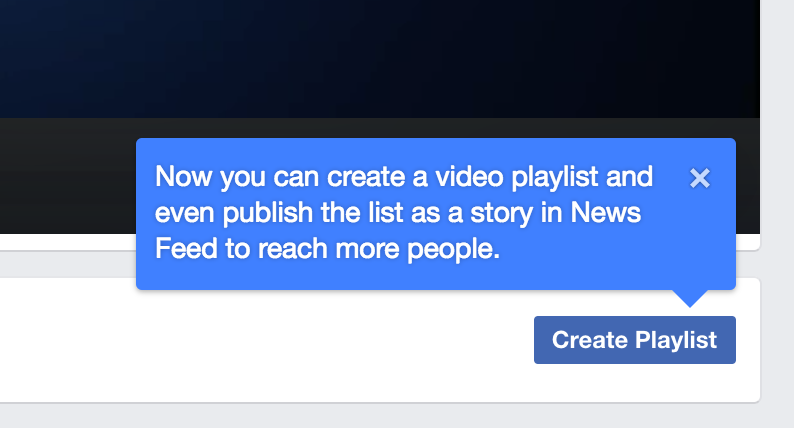
It’s very easy to fall into the “post and bail” strategy with videos. We spend all of our energy posting video content, but fail to follow-up with any further promotion. Video playlists are a great way to draw more attention to your videos, and tell a more thought-out story of your destination.
If you have a lot of videos on Facebook, take the time to curate them into playlists. If you don’t have a lot of videos, it’s time to start making them. (Read our blog about ways to succeed with video for some ideas!)
Here’s how to make video playlists:
- Go to the videos tab on your Facebook Page.
- Click the blue “Create Playlist” button on the right.
- Enter a title and description for the playlist.
- Select the videos that fit the theme of your playlist.
- Click and drag the videos in the order of your choice.
- Select “Create Playlist” on the right.
Be sure to organize your videos in playlists with themes such as seasons, quick shots, or niches!
3. Organize Photo Albums
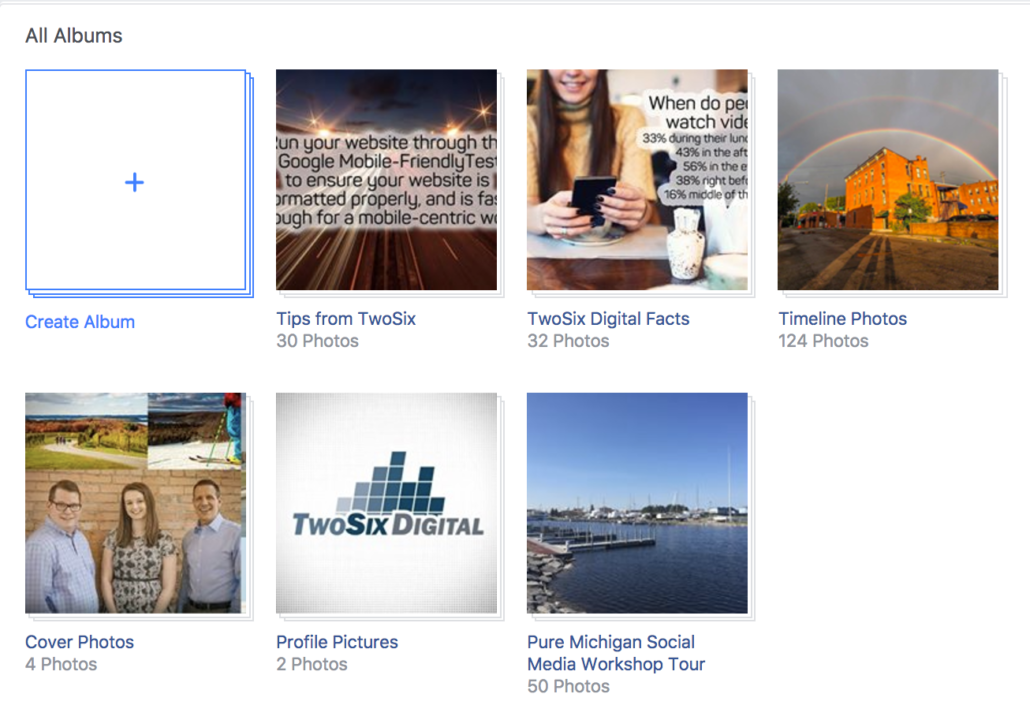
The easiest (and most common) use of Facebook photos is to dump them onto your timeline. Instead, organize photos into photo albums. These can be shared on other social media channels, or embedded into blogs/landing pages.
Just like video playlists, organize photos into albums based on seasons, major events or niches, and themes. Quick tip: Avoid adding a date or year to the title of your albums.
Here’s how to create a Facebook photo album with OLD photos that were previously shared:
- Go to the photos tab on your Facebook Page.
- Hover over a photo you wish to add to a photo album.
- Click the “Edit or Remove” pencil in the top right corner of the photo.
- Select “Move to Other Album” from the drop down menu.
- Choose a photo album OR “Create Album” from the dropdown menu.
- Click on “Move Photo”.
- If you are adding to an existing album, your work here is done!
- If you are creating a new album, follow these steps.
- Add the album’s name, description, and location.
- Select “Save”.
- Navigate to your newly created photo album.
- Click three dots in the top right corner.
- Select “Add Photos from Page” from the drop down menu.
- Pick the photos you wish to add to the album.
- Once you are done selecting the desired photos, click the “Add Photos” button in the bottom right.
Here‘s how to create a Facebook photo album with NEW photos that haven’t been shared:
- Go to the photos tab on your Facebook Page.
- Select the “Create Album” option.
- Upload the photos you wish to share.
- Add the album’s name, description, and location.
- Organize the photos in the desirable order.
- Add captions to the photos, and tag relevant partners.
- Select “Post”.
Does it seem daunting to sift through the hundreds (or thousands) of photos that have been posted on your timeline? This is a great project for a “slow week”, the last half hour of your day for a month, or an intern project!
4. Add to Your Blogs & Landing Pages
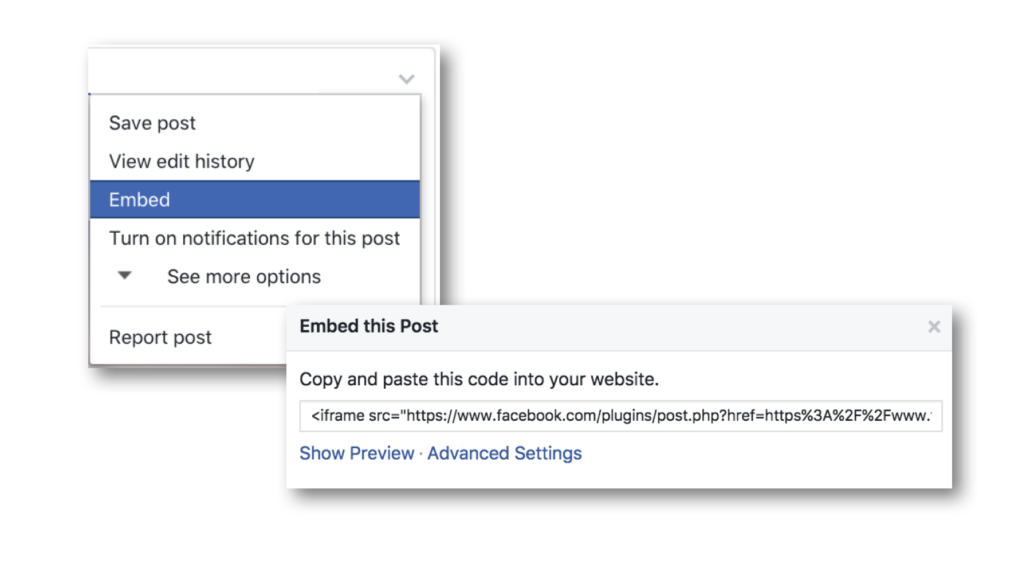
Embedding Facebook posts, photos, photo albums, and videos is widely underutilized. This simple tactic can help grow your Facebook presence, and add more vibrancy to blogs and landing pages.
There are different ways to embed each type of content:
- A resource on ways to embed Facebook posts, photos, and videos.
- How to embed a Facebook photo album.
Embedded content can be added to evergreen blogs, but you can also get creative, and make blogs surrounding these themes:
- A Year in Review: Videos from Our Destination
- Top Facebook Photos of the Month from Our Destination
- Best Blogs of the Year from Our Destination
Remember, embed codes can (and should) be leveraged with other channels such as Instagram, Twitter, Pinterest, and YouTube.
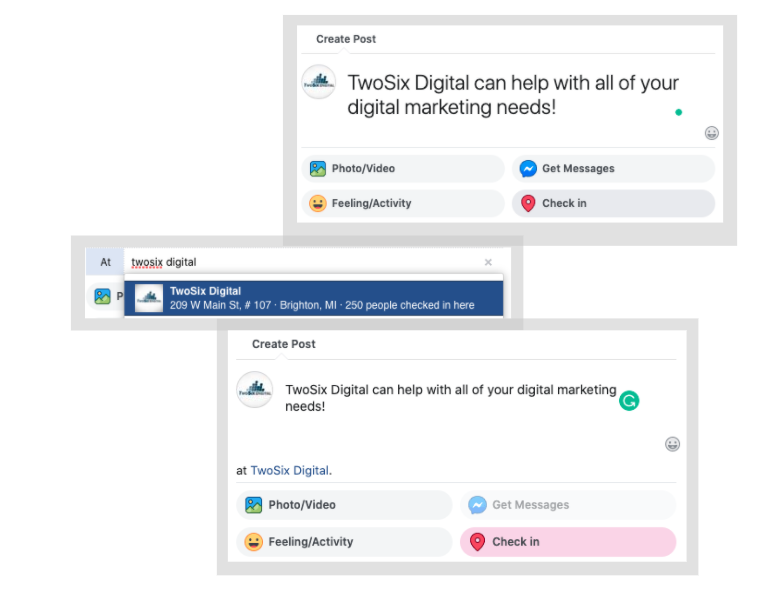
5. Always Tag Locations in Your Posts
Destination marketers are place-makers. We want to draw as much attention as possible to our destination. So, why NOT tag your location in every post? It’s pretty simple to do:
- When creating a new Facebook post, select the location pin on the bottom of the post.
- Always tag the specific location you’re highlight within the post! If you can’t find it, try tagging your general location (i.e. city, metro, county, state).
- WARNING: Make sure you get it right, because this cannot be edited after posting!
Simply make this a best practice for every single post. It’s simple, and effective!
6. Organic Targeting: Narrow Your Reach
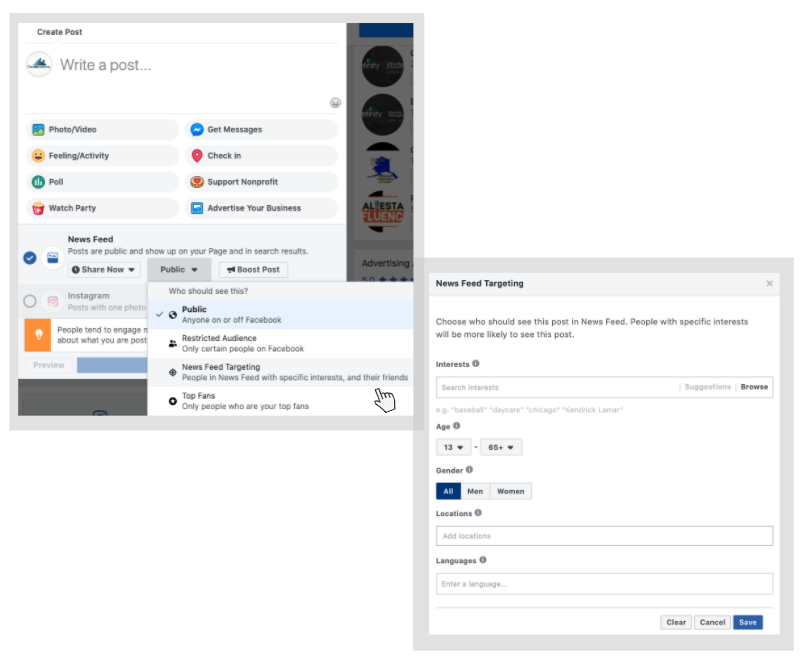
One of the major benefits of using paid promotion is the ability to target a specific audience. However, did you that you can target specific users to deliver more relevant content to the right audience? You can target users with specific interests, restrict locations or ages, or just post to your top fans. This can be really useful when your post is very niche.
Here’s how it’s done:
- When creating a new post, click the ‘Public’ dropdown menu and select the “News Feed Targeting” option.
- First, select relevant interests for your audience. These options are not as expansive as paid targeting, but you can still be really specific!
- Here, you can narrow your audience by age, gender, location, and language.
- Select “Save”.
- If you do not see the target button on your page, turn on your permissions by following these directions here.
WARNING: Make sure you have no intentions of “boosting” or using paid promotion. You are unable to promote posts with organic targeting!
Note: a lot less users will see your post if you use one of these methods, since only users that match the criteria will see it.
7. Utilize The Facebook Pixel
The Facebook Pixel is often overlooked. However, it is imperative to gauge the effectiveness of your ads, track actions on your site, and build audiences. Learn all of the benefits of the Facebook Pixel here.
First you need to create your Facebook Pixel:
-
- Go to your Facebook Pixel tab in Ads Manager.
- Click Create a Pixel.
- Enter a name for your pixel. You can have only one pixel per ad account, choose a name that represents your business.
- Check the “Accepts Terms of Use’ box
- Generate your Pixel
Next here is how to instal your pixel:
-
- Go to the Pixels page in Ads Manager
- Click Actions > View Code
- Copy the code and embed it into each landing page on your site. Add the pixel code between the tags within your HTML code on each page
8. Use Your CTA Button
Facebook is one of the most used social media platforms that is loved by millions of users a day. Which is why it’s so important to use your Call to Action button on your profile. There are plenty of buttons you can use.
To set up your button:
- Click on the “Sign-Up”button.
- Choose which button you want people too use.
- Each selection has sub-options to choose from — then click “Next”
- You can then add the website link to where you want the button to be directed.
- Select “Finish”
Note: Use a CRM code to track what users are coming to your website from your Call to Action button. This can help track the effectiveness of your Facebook page!
9. Review Insights
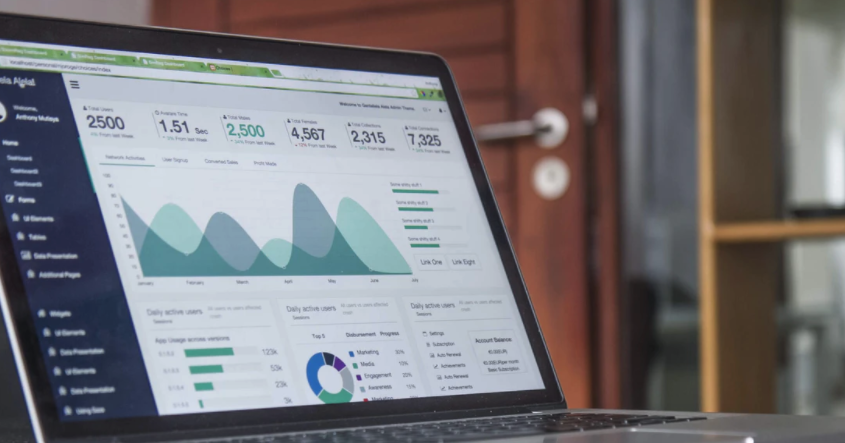
There is so much free information available at your fingertips in Facebook Insights. Simply select “Insights” at the top of your Facebook Page, and be amazed with all you can discover, including:
- The best times to post.
- Top content based on reach or engagement.
- Top content types (i.e. photo, video, link, etc.).
- Page demographics.
- Make notes of spikes in reach, and identify what content was posted to cause this reaction.
- Make notes of spikes in Page likes, and identify campaigns or tactics that caused this reaction.
If you feel overwhelmed by Facebook Insights, TwoSix Digital would love to take a look! Our Digital and Social Media Audits take a deep dive into your analytics, and provide suggestions on your audience. In the meantime, just take 5 minutes to take a look for yourself. You are bound to discover something enlightening!
10. Create a Video Cover Photo
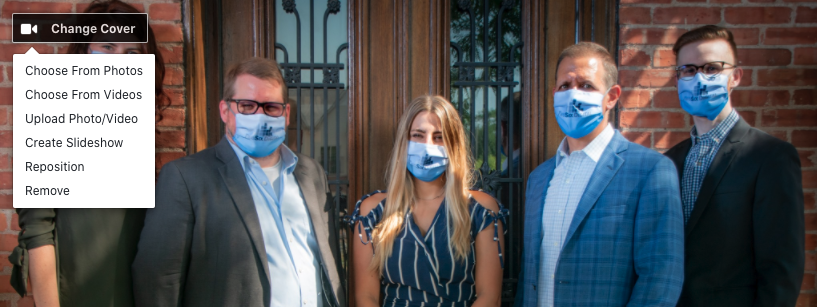
Contrary to the infamous name of the “Cover Photo” — Facebook lets you also use a video or create a slideshow. Just select a video that meets Facebook’s technical requirements (recommended 820X462). The video must be between 20 and 90 seconds. Added a Cover Photo is as simple as hovering over the camera icon on your cover photo. Select where and how you want to select your photo/video. When you upload an image or video, you can crop or trim to best fit the cover.
As always, check back here weekly to see what informative blogs we’re posting on our blog. Don’t forget to also sign up for our e-newsletter to make sure you keep up-to-date on all things TwoSix Digital!

