
The Ultimate GA4 Migration Checklist
Updated: June 19th, 2023
Google Analytics 4 (GA4) is the newest platform of Google Analytics that everyone will need to switch to when the old version of Universal Analytics (UA) stops collecting data on July 1st, 2023. Google originally announced a deadline of February 28th, 2023. However, it appears the deadline is still July 1st, 2023. Unless you opt-out or complete the setup checklist first, Google will copy settings and configurations from your UA property to a new or existing linked GA4 property. As a result, taking the steps to ensure a smooth and successful migration to upgrade to GA4 prior to March 2023 is critical. Whether you’re new to Google Analytics or a seasoned user, this guide will provide you with a comprehensive overview of the process, including verifying installation, property setup, and configuration best practices. Let’s dive into the GA4 migration checklist.
Where Are You With GA4?
Before we get started, first select what stage you’re at with the Google Analytics setup and installation process.
I Have GA4 Installed I Have a GA4 Property, But Not Installed I Need to Make a GA4 Property I’m Unsure If I Have GA4
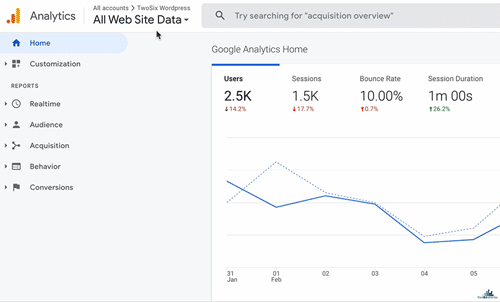
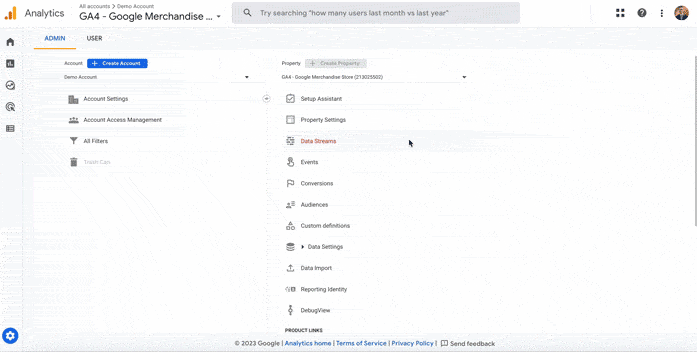
How to Know If You Have a GA4 Property
If you’re not sure whether or not you have Google Analytics 4, there’s an easy way to check if you have access to one.
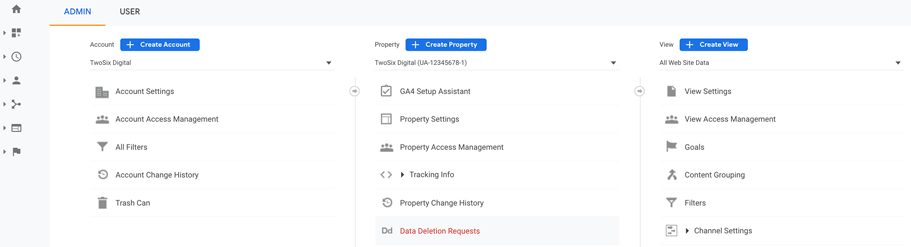
In the example above, we see two properties with the same name. The first is an Universal Analytics property due to having “UA-” at the beginning. The second one is a GA4 property, as it just has numbers.
- Start at analytics.google.com
- Go to Account selector in the top left
- Select the relevant Account and look under Properties & Apps
- Universal Analytics properties start with “UA” and end with a number (UA-XXXXXXXXX-1).
- Google Analytics 4 property IDs have only numbers (XXXXXXXXX).
How to Make A GA4 Property if You Already Have Universal Analytics
If you don’t have a GA4 property, it’s time to make one! We will go through our basic, recommended installation process for those that already have an existing Universal Analytics property. This will apply to most users, but if you’re totally new to Google Analytics, begin here.
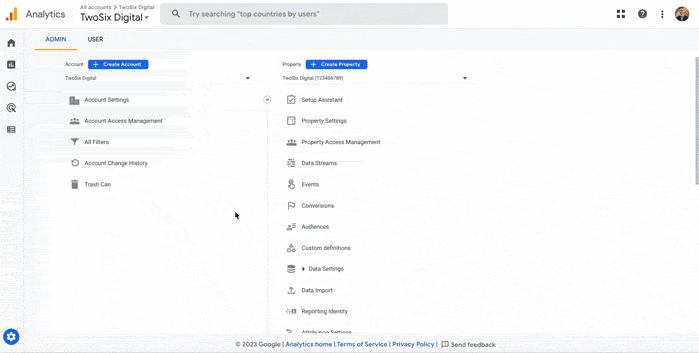
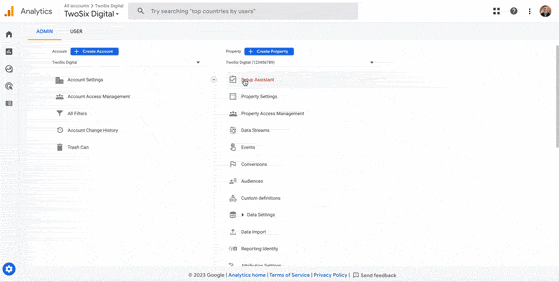
Double check you’re in the relevant Account, have the relevant Universal Analytics property selected, and then click “GA4 Setup Assistant”.
-
- Start at analytics.google.com
- Go to Admin
- Make sure the relevant Account is selected
- Make sure the Universal Analytics property that you use currently for your website is selected under Property.
Start the Installation Process with GA4 Setup Assistant
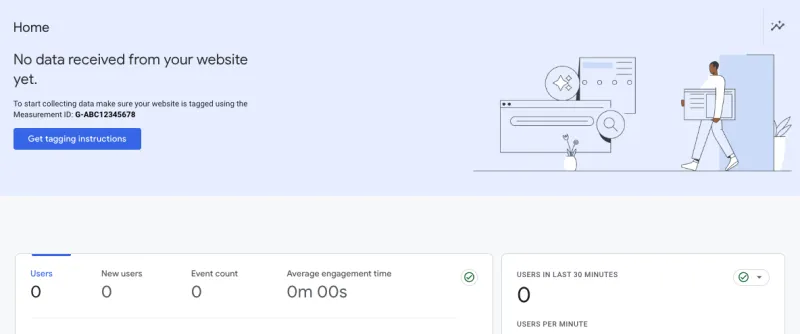
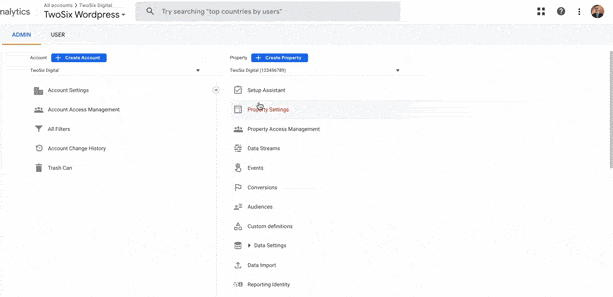
This GA4 property has been created, but not installed on the website.
- Click “Get tagging instructions” from the Home page of yanalytics.google.com.
- You can also get here by going to Admin, “Data Streams”, selecting your website or by create a new stream, clicking “Configure tag settings” and clicking “View Tag Instructions”.
- You now have two options: “Use a Google tag you already have” and “Install a Google Tag”.
- Note: If you installed a new Universal Analytics property within the last two or three years, it’s worth clicking the first option and searching for your gtag.js. By choosing this option, you won’t have to install anything.
- For novice users, we recommend choosing “Install a Google Tag”.
- Click on “Next” to install your new GA4 tag on your website.
- We recommend clicking “install manually”, copying the code, and asking your web developer to install the code into the header of your website.
- If you do not have a website developer and use WordPress, you could try a WordPress Plug-in.
The GA4 Migration Checklist
1. Verify Basic Installation
(High Priority, Low Effort, Low Complexity)
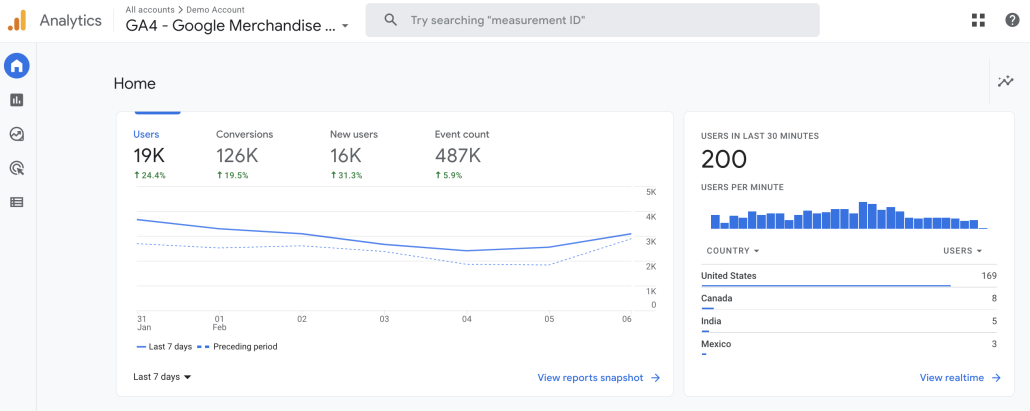
Once the GA4 tracking code is on the website, wait a few hours, and then check the home screen of your new analytics to see if there’s been any visits in the last 30 minutes.
- In the Admin settings
- Click “Data Streams” and click on your site
- If “Data collection is active in the past 48 hours” appears, your GA4 tag is installed and working
2. Manage Access and Users
(High Priority, Low Effort, Low Complexity)
Of course, while you can now use the property, you want to also make sure everyone who needs access to GA4 has it. While there are two types of access, Account and Property, we’ll just go through Account access as it’s the easiest and most relevant.

- Start at analytics.google.com
- Go to Admin
- Select ”Account Access Management”
- Identify who needs access (and who can be removed)
- Click blue “+” at top right
- Click “add user”
- Type in user(s), separated by commas
- Select access level, such as Administrator or Editor roles
- Click “Add” at top right
3. Enable Demographics, Cities, and Remarketing
(High Priority, Lowest Effort, Lowest Complexity)
When turned on, Google signals allows you to see demographics and interests of your users in GA4, as well as enabling remarketing with Google Analytics. Before you do so, be sure to review Google’s Advertising Features Policy to ensure your compliance.

- Start in the “Admin” tab, open the “Data Settings” drop-down, and click “Data Collection.”
- Under Google signals data collection, click Get Started and follow the prompts to Activate.
- In this same area, you can also toggle on “Granular location and device data collection” that allow you track data such as City and Device model.
- The last step under “Data Collection” is the “User Data Collection Acknowledgement”. By acknowledging this, you’re confirming you have the right to collect data from users and have a privacy policy on your website.
4. Organic Search Insights: Link to Google Products
(Medium Priority, Low Effort, Medium Complexity)
Are you interested in analyzing Google search results for your website in Google Analytics? Then you must link Search Console to do so.
Once you complete these steps, select the relevant Search Console property.
- Go to the Admin screen of your site’s GA4 property
- In the “Property” column, scroll down to an area titled “Product Links” and click “Search Console Links”
- Click “Link”
- If you have access to a Search Console property, you can click “Choose Accounts” and select the account you want to link
- Click “Confirm” and follow the “Next” prompts
If you didn’t see your website’s domain, you either don’t have Search Console set up or don’t have access. In either case, you will likely need your web developer to help you.
5. Set up Conversions: Creating Conversions or Migrating Goals
(Low Priority, Medium Effort, High Complexity)
Conversions are important, “bottom of the funnel” user actions on your site, such as making a purchase or signing up for your e-newsletter. Conversions in GA4 are like Goals in UA: the former now affects the engagement rate just the like the latter affected bounce rate.
Typically, it will be better to start from scratch with Conversions. Importing Goals from UA can often be messy. The only way to set up Conversions in GA4 is using Google Tag Manager. There’s an important nuance here, though: you must first set up tracking for Events and then mark these events as Conversions in settings.
Recommended: Make New GA4 Conversions
How to mark Events as Conversions in GA4
Once you verify Google Tag Manager is installed on your website or install it, it’s time to set up GA4 event tracking. After that’s completed, follow these steps to make an Event as Conversions:
- Go to the Admin screen of your site’s GA4 property
- In the property column, click “Events”
- Locate the Event that you would like to turn into a Conversion
- Switch the toggle “Mark as conversion”
Not Recommended: Import Universal Analytics Goals
You can rename them by selecting one of the names that populate in the dropdown or write your own.
If you have Goals from Universal Analytics that you’d like to carry over in GA4, there’s a migration tool you can use.
- Go to the Admin screen of your site’s GA4 property
- In the property column, click “Setup Assistant”
- Under “Property settings”, find “Set up Conversions” and click on the “>” button icon at the end of that row
- Click “Important from Universal Analytics”
- Select which goals you’d like to be conversion events
- Click “Import selected conversion” in the top right once done
6. Check Off the GA4 Migration Checklist
(High Priority, Low Effort, Low Complexity)
Be sure to double check that you’ve completed each task.
That’s right, you actually have to check things off Google’s GA4 Migration Checklist. This is something that will catch most of us off-guard, because it seems so innocuous. However, if you don’t, Google now states that your existing GA4 will have these settings configured automatically, so it’s imperative to complete this.
- Go to the Admin screen of your site’s GA4 property
- In the property column, click “Setup Assistant”
- Click on the “>” button icon menu and select “Mark as complete” for each step you’ve already done
Wrapping Up
Google hasn’t made this process easy for us, and in fact, has actually made it harder recently. However, by going through this GA4 Migration Checklist, you can be confident that you’ve completed everything you need to by July 1st, 2023. For more advanced settings, such as linking Google Ads and migrating audiences, or just help in general, feel free to reach out to us.
Learn More About Our Coaching Calls Contact Us to Schedule a Call

")


